hello Wednesday!
welcome to the next installment of our sew along!
today is my turn to share with you the tree block!!
to see the other blocks, check out Sally and Julie’s blogs…
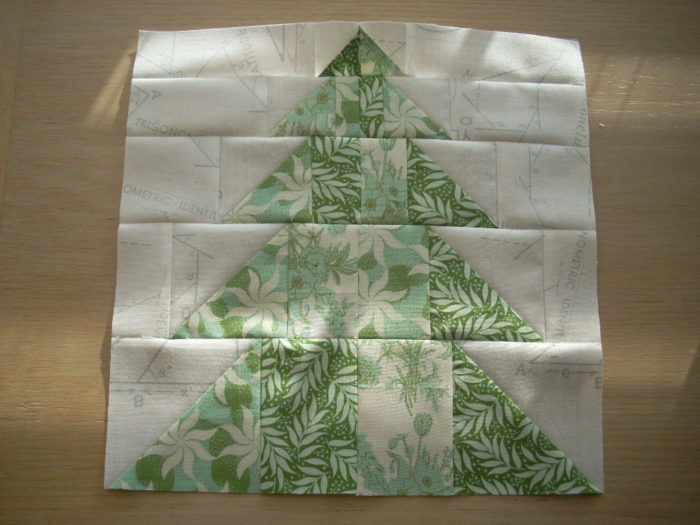
here is your tree block…
it finishes at 20 x 20 if you are making the bed runner and 10 x 10 for the tablerunner….
Julie will have a special tutorial for those of you making the lap quilt….as it uses the left half of this tree plus an extra block…
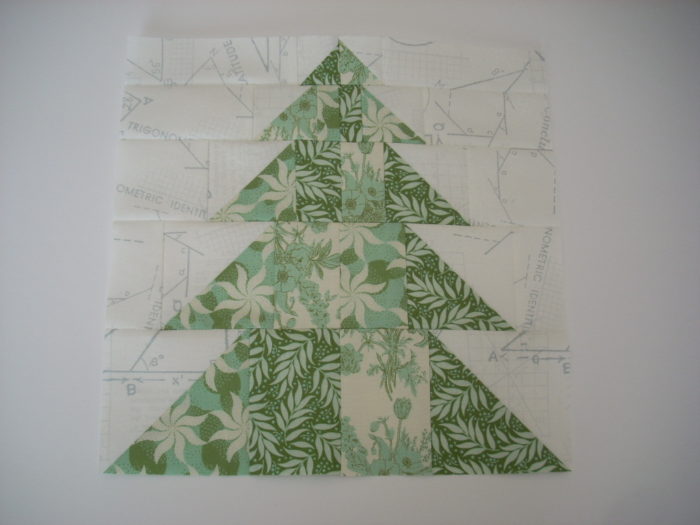
You will need one large tree for the bedrunner, two small trees for the table runner and three left halves for the bed quilt.
Supplies
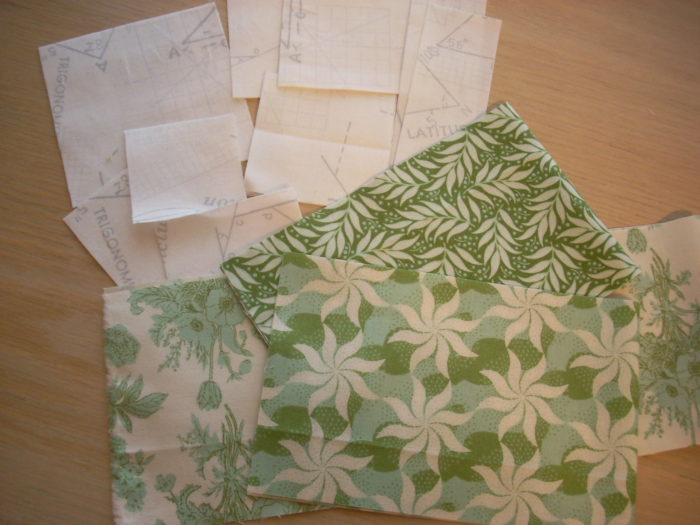
Green fabric – ½ yard WOF for large tree and 8 inches WOF for the small tree (I cut a 4 inch x 22 inch strip from three different Cottage green prints)
Background – ½ yard WOF for the large tree and 4 inches WOF + 5 inch square for the small tree
Finished size 20 x 20 inch for large tree and 10 x 10 inches for the small tree
Notes
Read all directions before beginning
Yardage is assumed 40” wide (WOF = Width of Fabric)
Seam allowance ¼ inch
Throughout the tutorial, the first number is for the large tree and the number in parenthesis is for the small tree.
Cutting Instructions
Cut two 7 inch (4 inch) strips from green fabric
Sub-cut: 2 – 7 inch (4 inch) squares
2 – 6.5 x 4.5 inch (3.5 x 2.5 inch) rectangles
2- 6 inch (3.5 inch) squares
2 – 5.5 x 3.5 inch (3 x 2 inch) rectangles
2 – 4.5 x 2.5 inch ( 2.5 x 1.5 inch) rectangles
2 – 4 inch (2.5 inch) squares
2 – 3.5 x 1.5 inch (2 x 1 inch) rectangles
2 – 3 inch (2 inch) squares
Cut two 7 inch (4 inch) WOF of background
Sub-cut: 2 – 7 inch (4 inch) squares
2 – 6 inch (3.5 inch) squares
2 – 5.5 x 2.5 inch (3 x 1.5 inch) rectangles
2 – 4.5 inch (2.5 inch) squares
2 – 5 inch (3 inch) squares
2 – 3.5 x 6.5 inch (2 x 3.5 inch) rectangles
2 – 4 inch ( 2.5 inch) squares
2 – 3 inch (2 inch) squares
2 – 2.5 x 8.5 inch (1.5 x 4.5 inch) rectangles – I cut this piece last and opened up my fabric and repositioned it to get this piece cut.
Piecing the block
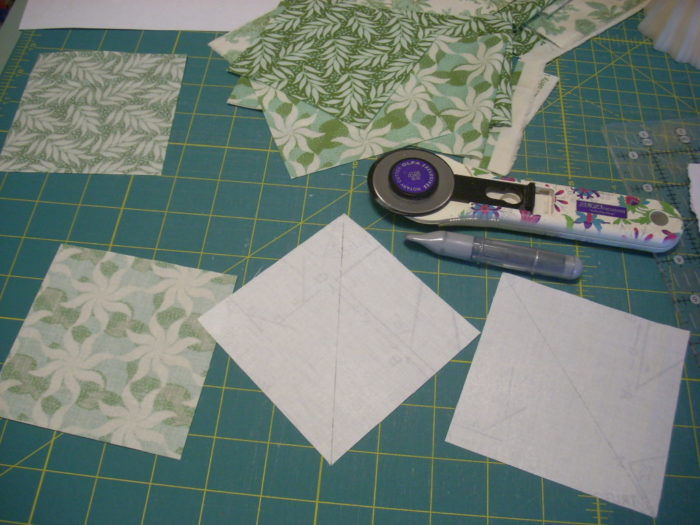
All of the half square triangles are constructed the same. Pair a green square with a background square, right sides together. On the back of the background square, draw a diagonal line. Sew a scant ¼ inch on each side of the line. Cut apart and then trim to the size for the row you are working on.
I opted to construct this tree from the bottom up, building one row at a time.
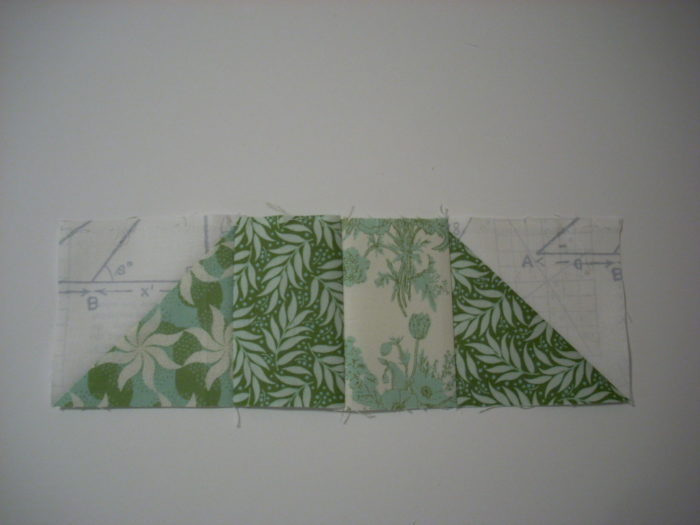
Row 5 – 7 inch (4 inch) half square triangle trimmed to 6.5 inches (3.5 inches), two green rectangles 6.5 x 4.5 inch (3.5 x 2.5 inch), 7 inch (4 inch) half square triangle trimmed to 6.5 inches (3.5 inches). Sew into a row.
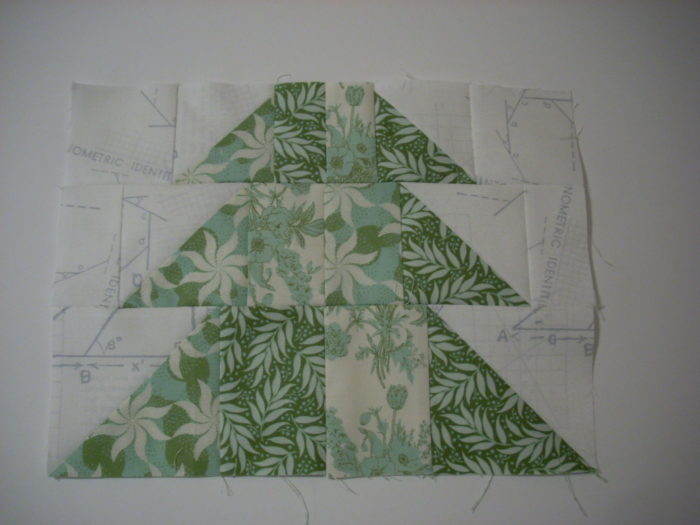
Row 4 – background 5.5 x 2.5 inch (3 x 1.5 inch) rectangles, 6 inch (3.5 inch) squares trimmed to 5.5 inch (3 inch) half square triangle, two 5.5 x 3.5 inch (3 x 2 inch) rectangles, 6 inch (3.5 inch) squares trimmed to 5.5 inch (3 inch) half square triangle and a background 5.5 x 2.5 inch (3 x 1.5 inch) rectangle. Sew into a row.
Row 3 – 4.5 inch (2.5 inch) background square, 5 inch (3 inch) squares trimmed to 4.5 inch (2.5 inch) half square triangle, two 4.5 x 2.5 inch (2.5 x 1.5 inch) rectangles, 5 inch (3 inch) squares trimmed 4.5 inch (2.5 inch) half square triangle and 4.5 inch (2.5 inch) background square. Sew into a row.

Row 2 – 3.5 x 6.5 inch (2 x 3.5 inch) background rectangle,4 inch (2.5 inch) squares trimmed to 3.5 inch (2 inch) half square triangle, two 3.5 x 1.5 inch (2 x 1 inch) rectangles, 4 inch (2.5 inch) squares trimmed to 3.5 inch (2 inch) half square triangle, 3.5 x 6.5 inch (2 x 3.5 inch) background. Sew into a row.
Row 1 – 2.5 x 8.5 inch (1.5 x 4.5 inch) background rectangle, two 3 inch (2 inch) squares trimmed to 2.5 inch (1.5 inch) half square triangles, 2.5 x 8.5 inch (1.5 x 4.5 inch) background rectangle. Sew into a row.
Sew completed rows into one unit to make the above tree block.
click here for the pdf….
linking up with Lorna….
and the giveaway for this week…

leave me a comment to enter…
I will announce a winner on Friday…
Happy Sewing!

oh your tree block is lovely. I love the background fabric and how you made the tree with different fabrics. thanks for the tutorial.
This is a pretty block, I am sure I have plenty of Christmas fabrics lying around that I could use. x
Your block is super cute. Awesome fabrics! Have happy holidays!! angielovesgary2 atgmail dotcom
Thanks for the tutorial!
Your block is just fantastic! So festive. 🙂
Very cute! I wouldn’t have thought the blue(ish) fabric would have worked but it came out great. Great for any level too!
I am sooo far behind on this quilt along, but hoping to catch up this weekend! Your tree is perfect! I do admire those scraps today!
That tree block is super cute!
On the morning with our first hard freeze, that yellow with the flowers looks extremely “spring-y”.
Very nice tree block and great instructions. Those scraps are Gorgeous. 😀
Love the aquas!
Spy some aquas.
doing a tree block has always been on my list….hopefully some day I do really get around to it!
Your tree block turned out great! Love those soft colours too!
Love the tree block!
Love your trees. Love the aqua scraps. Thanks for the opportunity to enter the giveaway.
Great Christmas tree block! I’d love to use your scraps in my scrappy around the world quilt! I have many blocks left to complete!
Love the tree block! I spy some festive green!
This block is so festive! It makes you happy just watching at it!
Love your Christmas tree block! Scraps of green fabric can be used and mixed with neutral colors. It would make a great pillow cover.